Portals
Portals are embedded windows that live right on your canvas. A browser portal lets you browse websites and preview local files. A device portal runs a real iOS or Android device. In both cases, your AI agents can interact with what's inside them directly.
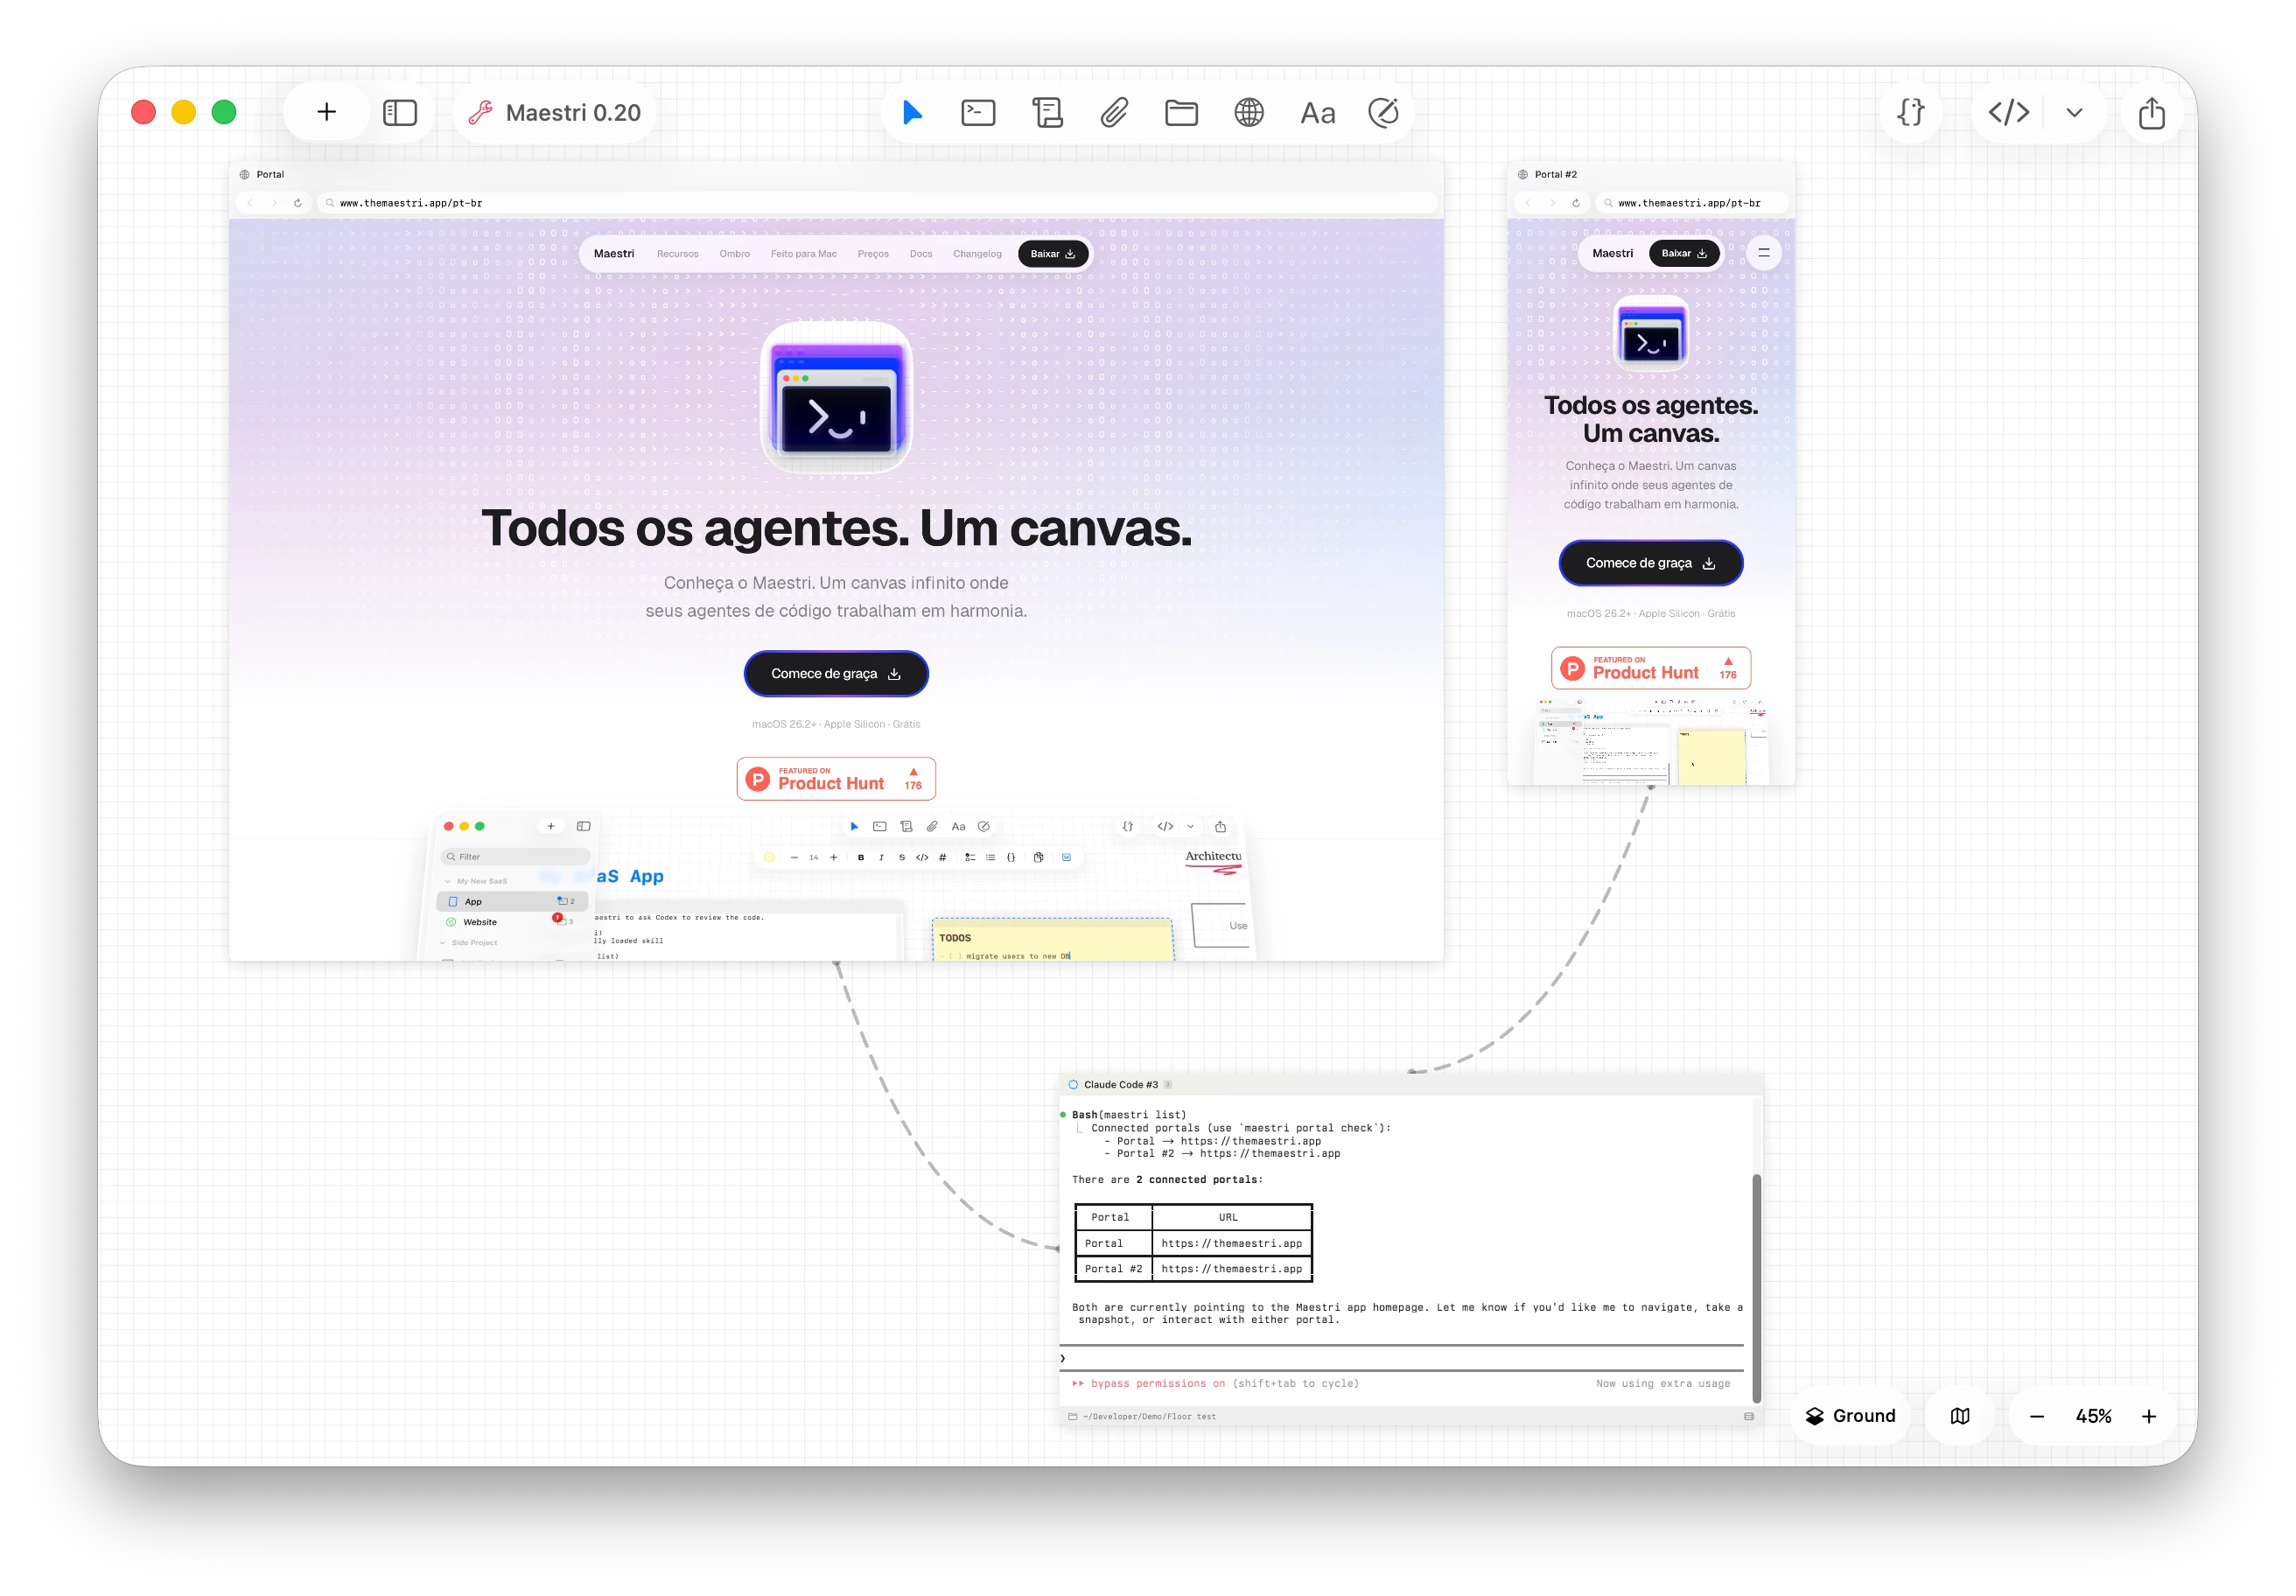
Creating a portal
Click the Portal button in the toolbar (globe icon) or press P to add a new portal to your canvas. Enter a URL — any website like https://example.com.
Each portal runs an isolated WebKit (Safari) instance with its own storage. Chrome support is planned for the future.
Connecting portals
You can connect a portal to another portal so they share the same storage session. This is useful when one portal needs to access cookies or authentication state from another.
Use the connection tool to link portals together, just like all other nodes on the canvas.
Agent automation
When a portal is connected to an agent's terminal, the agent can control it programmatically using the maestri CLI. No external dependencies, no MCP servers, no configuration — just connect and go. Like everything in Maestri, it's plug and play.
Portal automation is a custom-designed browser-use tool built for speed and token efficiency. Agents can:
- Click, type, and scroll — interact with any element on the page
- Navigate — go to URLs, go back, refresh
- Resize the viewport — set it to exact dimensions and check a layout at phone, tablet, and desktop widths
- Take screenshots — see the page visually, just like you do
- Run JavaScript — execute custom scripts in the page context
- Read the DOM — inspect the page structure
- See the browser console — catch errors and debug output
Agents can also create new portals on their own — they don't need you to place one manually.
To allow an agent to control a portal, connect them using the connection tool. Agents can see chained portals and control all of them.
Tip
Since portals run isolated browser instances, you can have multiple logged-in sessions to the same service simultaneously — useful for testing different user accounts.
Copying what a portal shows
Right-click a portal and choose Copy Screenshot to put a picture of what it's showing on the clipboard. It works the same for a web page and for a device screen, so a bug report or a message to a teammate is one right-click away.
Muting a portal
A page that plays sound can be silenced without leaving it: right-click the portal and choose Mute, and Unmute when you want it back. Muting belongs to web pages; a device portal's sound belongs to the device.
Design mode
Agent automation runs one way, with the agent reaching into the portal. Design mode runs the other way: you mark the part of the page you mean and hand it to an agent.
Pick the brush in the portal's toolbar and draw over whatever you want to talk about. Maestri turns the stroke into a selection, outlines it on the page, and opens Ask about this selection with a cropped shot of that exact region.
Type what you want done, pick which connected agent should get it, and send. The crop travels with your comment, so "tighten this up" or "rewrite this headline" arrives pinned to a specific piece of the page rather than a description of one, and the agent goes straight to that element instead of guessing which one you meant.
Device portals work the same way, so you can circle a control in a running app and ask for it by sight.
Note
A selection goes to a connected agent, so connect the portal to a terminal first, the same way Agent automation describes.
Device portals
A portal can hold a mobile device instead of a web page: an iOS Simulator, an Android emulator, or a physical Android phone plugged into your machine. It's the same node, with the same connections and the same agent automation, so everything you already know about portals still applies.
macOS only
iOS Simulators require Xcode and are macOS only. Android emulators and physical Android phones work in Maestri for Windows.
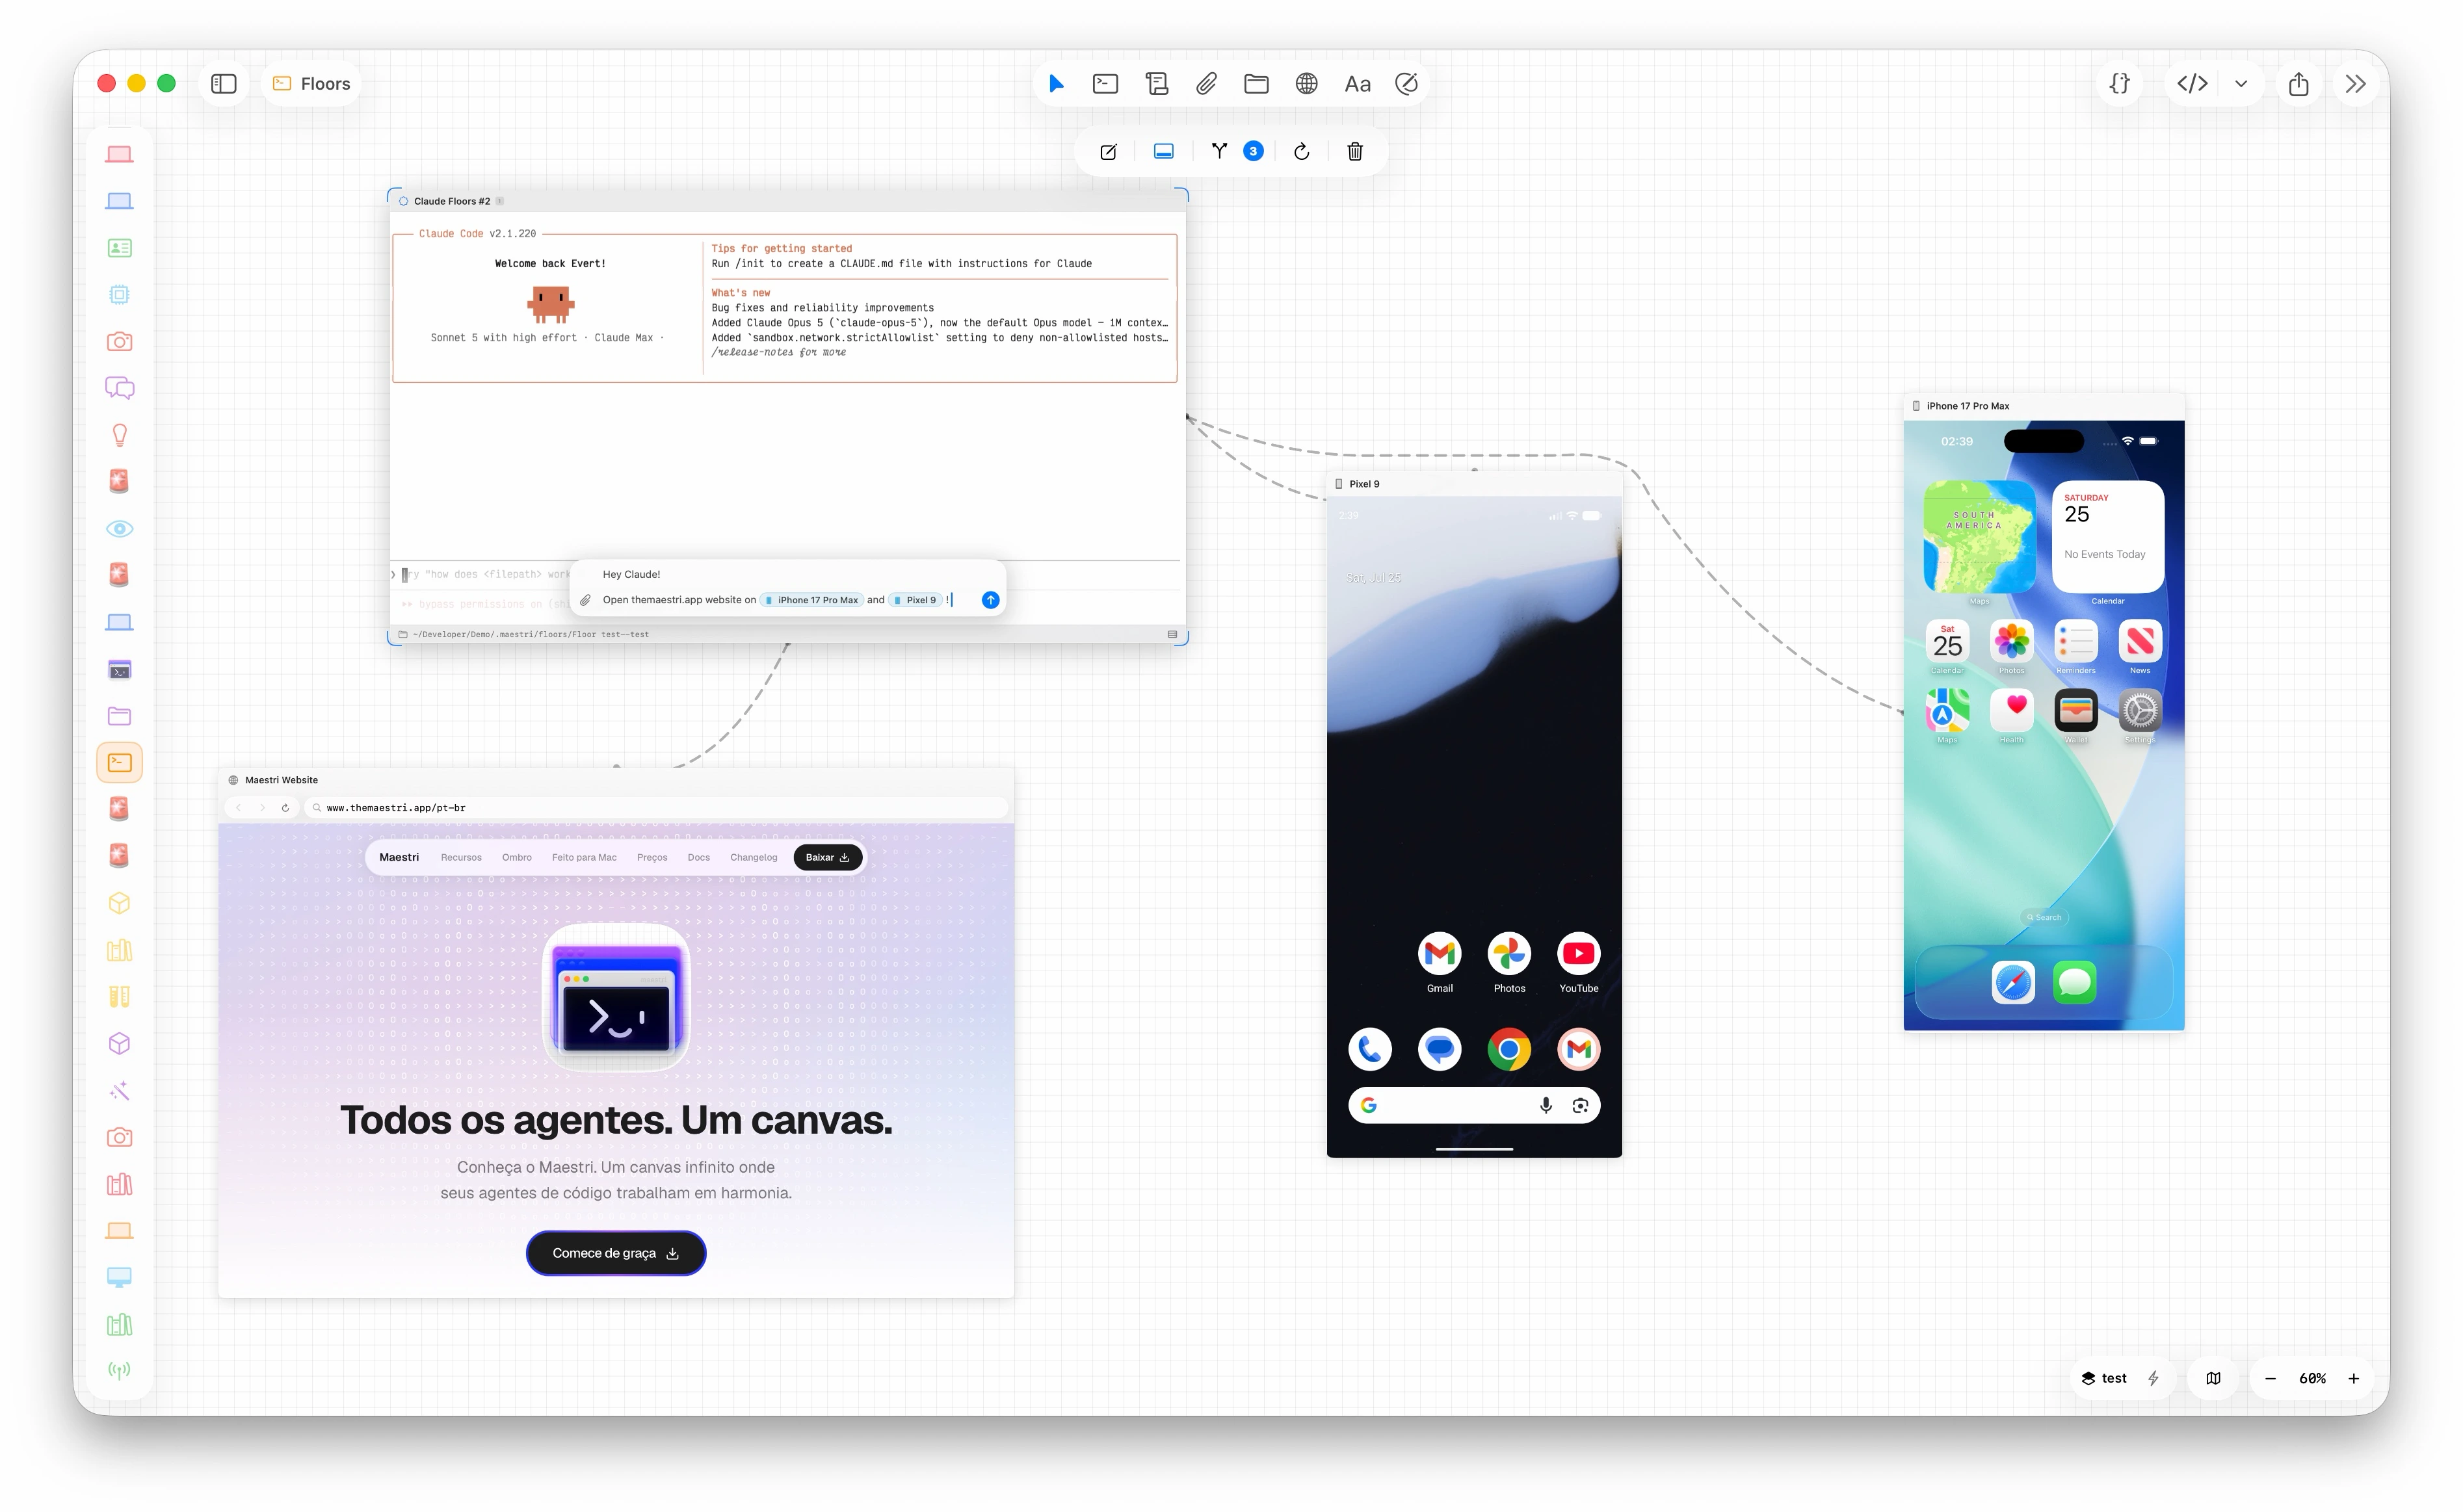
Opening a device
Open the New Portal sheet and switch to Devices, or use the @New Device Portal action in the Prompt Composer.
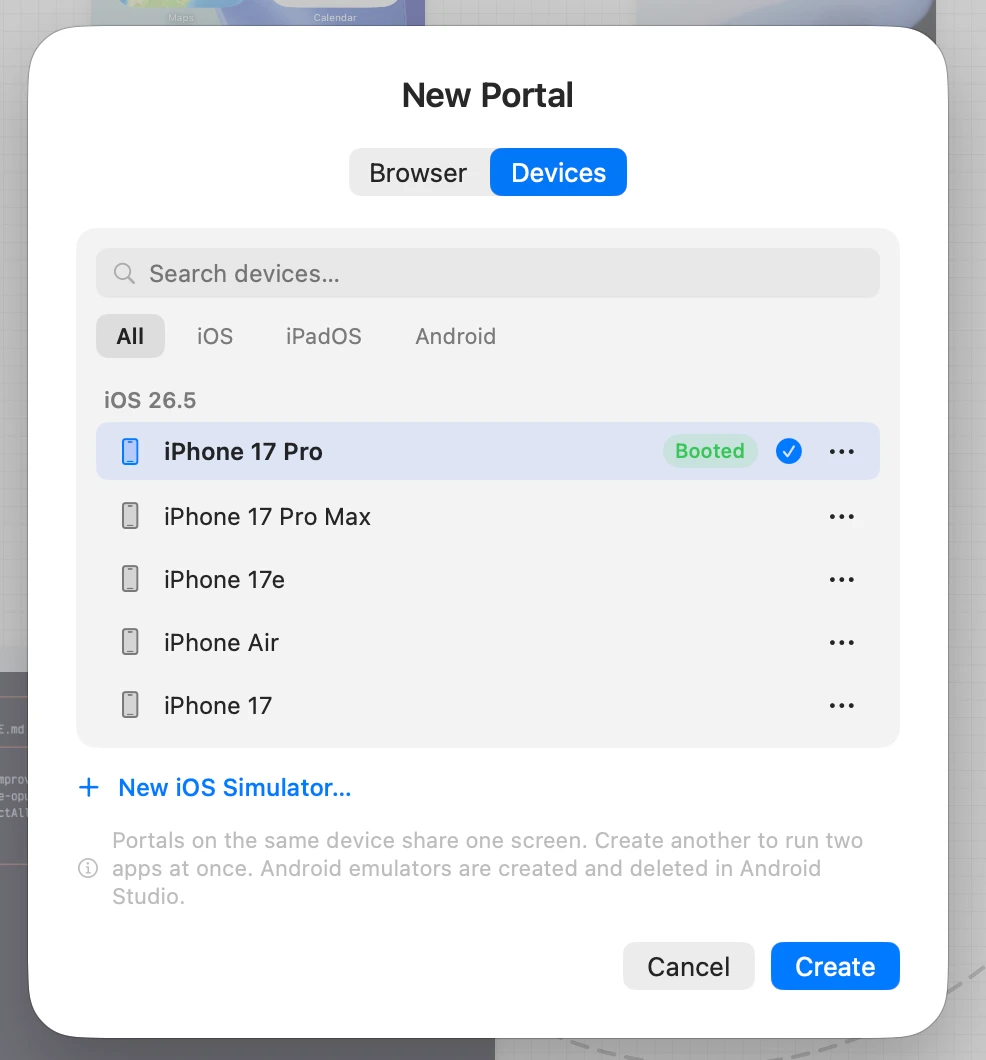
You'll see every simulator, emulator, and phone your machine can drive, grouped by OS version, with a search field and filters for iOS, iPadOS, and Android. Already-running devices are marked as Booted. Pick one and Maestri boots it if needed, connects it, and places it on your canvas.
Need a device you don't have yet? New iOS Simulator… creates one from a searchable model list without leaving Maestri. Android emulators are created and deleted in Android Studio's Device Manager, and a physical Android phone shows up as soon as it's plugged in.
Device portals run on a device runtime built from scratch. The portal draws the device's own display buffer straight to the GPU and sends your clicks and keystrokes through the device's native input pipeline, so it stays as smooth and immediate as the device itself instead of crawling through screenshots and shell commands.
Several device portals can run at once, and each one survives workspace and floor switches. Two portals pointing at the same device share one screen, so reach for a second device when you want to run two apps side by side.
Driving a device by hand
Click into a device portal to control it directly with your mouse and keyboard: click to tap, type to send keystrokes, drag to swipe, and click and hold for a long press. Rotate the device to switch between portrait and landscape. These gestures work the same way on Android devices as they do on iOS.
Resizing an app
iOS 27 lets an app run at any size you give it instead of a fixed device frame, and simulator portals speak that language. Click Resize App… in the portal's toolbar, type a width and a height between 100 and 4096, and Apply. The app resizes live while the portal follows it and holds your zoom, so a narrow phone, a wide iPad, and everything between are all testable on the same simulator. End Resize Mode returns the portal to the device's own screen.
A connected agent can drive the same thing, so asking for a screen at three sizes is work you hand off rather than do: it starts the session, applies each size, and ends it when it's done.
Note
Resizing needs the Xcode tools that ship with iOS 27 and an app that supports it. The popover says so plainly when the installed toolchain can't do it.
Automating a device
Connect a device portal to an agent's terminal and the agent drives it with the same maestri CLI. No XCUITest, no Appium, no extra tooling. Instead of the DOM, agents read the running app's real element tree, with true labels and exact positions, so a tap lands on the button rather than a guessed coordinate. Agents can:
- Tap, type, scroll, and swipe anywhere on screen
- Press hardware buttons like home, lock, and side, plus Android's back and recents keys
- Launch and terminate apps by bundle id or package name
- Open URLs through the device's own URL handler
- Read the element tree, including any web view embedded in the app
- Take screenshots, and boot or shut down the device
Embedded web content joins the same element tree, so an agent testing a native app can walk straight through a web-based login or checkout screen without switching tools.
Building and running your app
Point your build at the portal's device and the app you test is the app you just built. An agent can read the device's identifier from the portal, build the project, install it, launch it, and then tap through the result, all from the same terminal.
Note
On iOS, an app exposes its element tree when Maestri launched it. If an app was started by Xcode or by tapping its icon, launching it again through Maestri brings it under the accessibility agent, so the agent reads a real tree instead of falling back to a screenshot.